Blog

Must-Have Skills for Product Managers Working Remote

Here’s a run-down of my tips for being a good product manager even while working remote

Lately, the need for Product Managers is increasing because there are more technological and digital companies than there has ever been. This is causing more and more people to become PM’s and complete tasks that they aren’t sure how to do. With COVID-19 hitting this year, many people have been forced to work from home. This has caused the lines of business and home life to become blurred.

Luckily for me (ha!), I started my journey as a Junior Product Manager during this crazy time. I’ve learned both about the career path of a PM, AND how to work remotely — all in one go. I’m writing this article to share my insights on the tips and tricks to becoming a modern 2020 Remote Product Manager.

What do you Product Manager’s do?

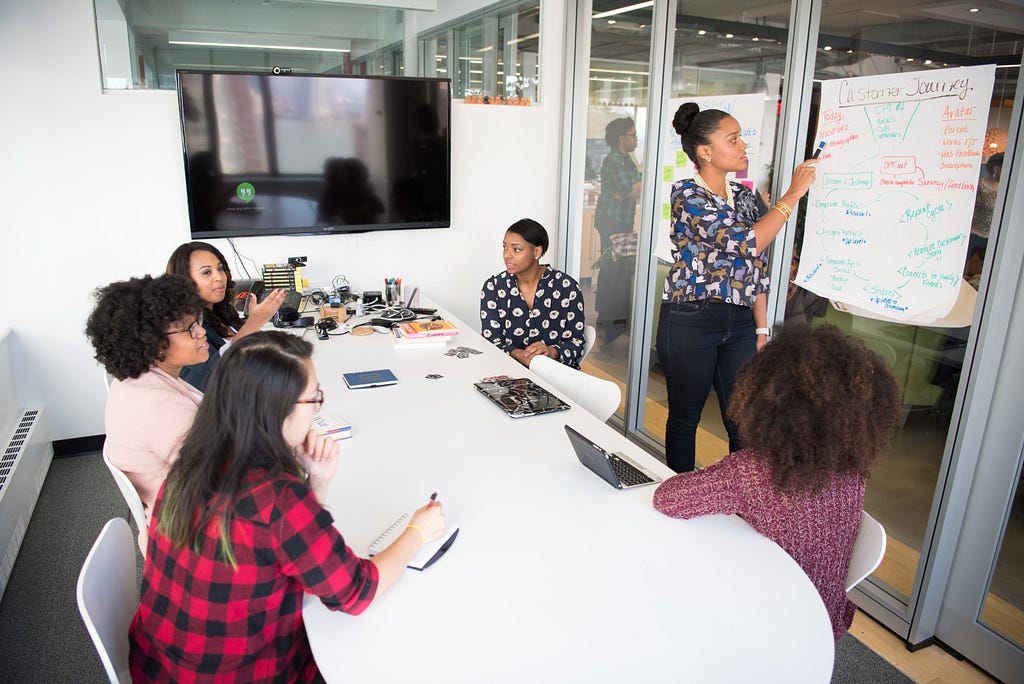
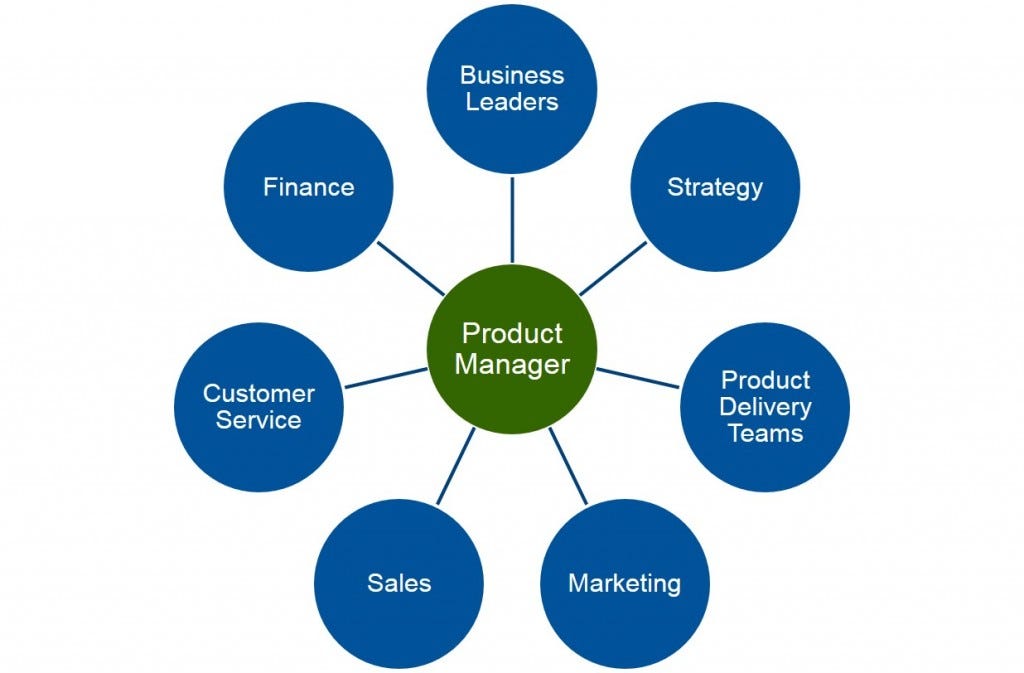
Products managers are responsible for overseeing and leading a product to from conception to release, and guiding the team working on the product. The most important task of the Product Manager is organizing the product(s), their requirements, their progress, and their outcomes. They create the plan of what the product needs to accomplish in order to progress through its development and release.

How to become a Product Manager

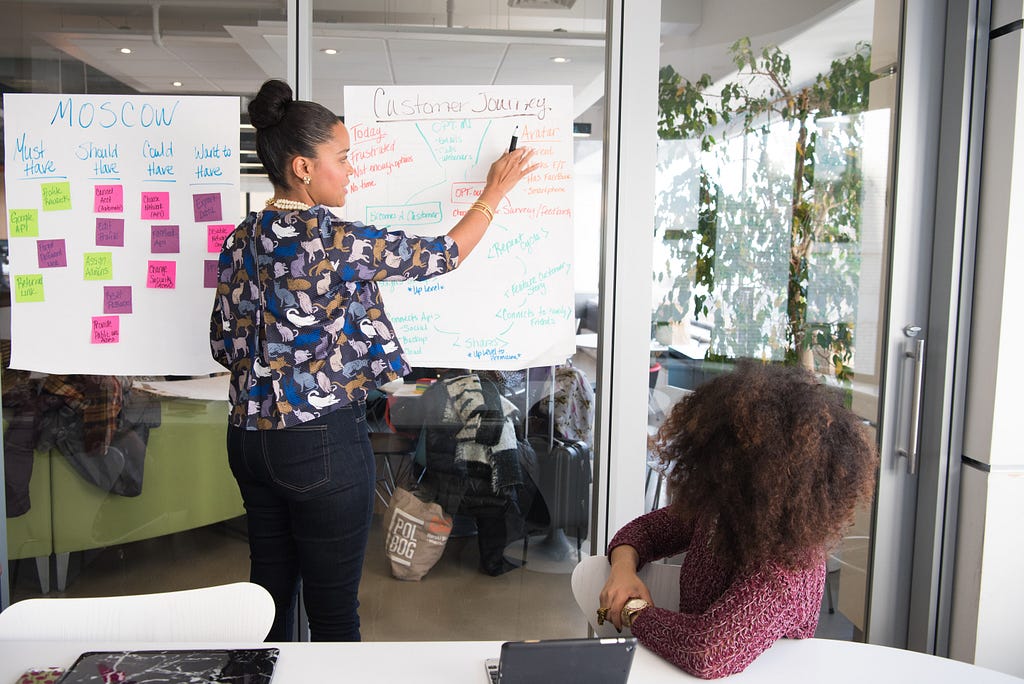
Organizational skills are the most important quality a Product Manager can have. Successful Product Managers possess incredible organizational skills, and an ability to project manage. Success also depends on a PM’s ability to stay on top of their team and be up to date with anything and everything that is going into the product.

Strategic thinking, business and marketing, management and communications, are all skills that will be required at one point or another while acting as a PM. It’s a lot — but it’s a great job to diversify your skills.

Having these skills is the first step, but being able to use them in a professional setting is key. This means applying your knowledge to each situation and each product. You should do as much research about the product as possible, including how it operates and what faults it may have. If possible, introduce it into your daily life so you can be aware of how the product actually works and who it is aimed towards. Knowing who you’re working with is crucial too — become aware of your boss’ goals, requirements, and their future expectations.

How to be a good remote worker

In the age of remote work, it’s important all employees, not only PM’s, know how to be a good remote employee. This is another opportunity of exercising your organizational skills. PM’s are a vital piece of the product development cycle. Their hands are in everything from start to finish, and performing across the board remotely is difficult but entirely possible. You need to master the art of being a self-starter. It’s…a different task.

  1. Create a Detailed Schedule and Stick to It

To continue working like you may (or may not) work in your office, create a schedule for yourself and stick to it. Be very strict on work days and times and stick to it. Each day, make a plan or to-do list for yourself to follow throughout the day. You can make that plan at the beginning of the week or each night you finish working to recap what you accomplished and what still needs to be done.

Personally, I’m lucky in that I get to choose my own schedule which may not be the case for everyone. I choose times of the day when I can be alone and I have no classes (I am an intern for this great company). I write down the length of time I want to work for and strive to reach that goal, even going over if I am able. After I finish up, I write what I got done in what time frame and write a to-do list for the next time I work. This gives me time to think about what’s done and how what I just finished can help me with what I need done next.

2. Get Organized and Stay Organized

To-do lists are a lifesaver in so many situations. They are simple and easy to make but at first can seem daunting because you need to compile all of your tasks. If you feel like you’re lost in the ocean because you don’t know where to start or you don’t even remember what you need to do, contact someone. Get in touch with either someone you work with or, more likely, or boss(es) and ask what your assigned tasks are.

If you can, prioritize everything. If something needs to get done that day, put it at the top of the list. Within the next three days? Right underneath. Something needs to get completed by the end of this month? I’ve already given you my process of to-do lists, try to make one for yourself! Seeing everything laid out in front of you will help stress go down and work time go up.

3. Communication is key to working with a digital team

Familiarize yourself with your boss and your team as much as possible. Get all your resources in order on how, where, and when to get in touch, ask questions, or get updates from the people you work with. Figure out if email is the preferred method of contact or if they use Slack or another messenger.

Whichever method, be as professional as you deem necessary depending on how comfortable you are with these people. However familiar you may speak to a person, always be clear and concise about what you’re asking about or what you need from this person. As a product manager, you need to answer to your boss(es) but you also need your team to answer to you. If members of your team have trouble with communicating, don’t penalize them but instead reach out and let them know how to best get ahold of you, as well as others on the team.

You can take any of these tips and incorporate them into your everyday life, working remote or not. You can take these and do some trial and error, see what works for you and tweak ones that don’t quite help you enough. Figuring out how to work remotely and effectively is a big mountain to get over but what it really comes down to is what works for you and what doesn’t in order to get work done.You will become more confident in your product managing abilities and as you get more comfortable with yourself in your career.

visit drkmtr.marketing to learn more about our product development services

I’m a Product Management Intern at Dark Matter Digital — a strategic product studio that specializes in helping companies create and test new software verticals.

I’m also a sophomore at Drexel University, where I study film and video production.

Follow along with my journey of being a first time Junior PM in my blog series, which you can find on the Dark Matter Digital publication.

See ya!


Must-Have Skills for Product Managers Working Remote was originally published in Dark Matter Digital on Medium, where people are continuing the conversation by highlighting and responding to this story.

Show More
Show Less

This App Will Change Your Perspective on Stories

GoinOn is recreating the social experience by bringing us closer to our friends and family through something we know and love — Stories.

As of late, there’s seemed to be a very long dry spell with social media apps. You have the Big Four — Facebook, Instagram, Twitter, and Tumblr — and then a few others that come up every now and then but…that’s it. That’s been it for the past six years seemingly. Granted, the Big Four have all had major updates and changes that work to keep up with their audience as they change too. However, updates and new layouts won’t hold over for another six years. There needs to be alternatives. Alternatives, if not for the sole reason to say screw the big corporations, because screw the big corporations.

But now there’s GoinOn.

Goinon is a new mobile app that launched onto the iOS app store only a few months ago. Aiming for a new social experience, GoinOn has taken your typical “stories” and turned them into a collaborative way of communication with friends. If you’re looking for an alternative to the repetitiveness of social media (hello, TikTok vs Reels *eye roll*) then I suggest you give GoinOn a try with your friends.

About GoinOn

GoinOn focuses on ‘Stories with Friends’ — and that’s exactly what that app is all about. In a world where social media has become so robust and complicated (Instagram profiles now have about 6 different tabs for different kinds of media,) you’ll be surprised at how a simple update to your typical stories structure can be so engaging and actually fulfilling.

GoinOn is a fusion of all your favorite functions featured on social media, wrapped up in one, easily operated place. It’s also a place that offers many new ideas, methods, and shortcuts that haven’t been seen before. Navigating through the app is very simple and straightforward. It’s picture based, with videos able to be uploaded into public or private stories. You find your friends, give them a follow, and immediately see their stories. Maybe you get an invite to join someone’s private story.

Creating a community (or communities) is exactly what GoinOn is used for. Make public stories for your profile so all your friends can see, make private stories for certain subjects, like art, books, special interests, and start conversations in there. There has never been such direct communication between groups of friends. You can always make a comment thread on instagram or swipe up on snapchat but GoinOn offers you a direct connection to your friend groups where they can add their own content that is not limited to comments or likes, but actual posts.

The more you post, the more opportunity to get interaction from others. This, of course, is a given for any social media site — you need to be social. GoinOn has found a way to motivate its users into consistency. Admitably, in addition to checking my feed everyday, I post multiple times a day and interact with other posts by liking or commenting on them. It’s easy and enjoyable, and I actually have more conversations on GoinOn than any other social platform. Somehow more so than any other social media platform now.

“It’s easy and enjoyable, and I actually have more conversations on GoinOn than any other social platform.”

For the most part, my circle of friends is small. Personally, I spend a lot of time on this app communicating with family members I don’t get to see very often and very close friends. Although, I have branched out into interacting with friends-of-friends through larger group stories that revolve around sharing music, movies, books, or daily challenges. The sense of community that you build is almost unparalleled. A lot of the responsibility falls on you as a user to keep the engagement between others up but at the end of the day, it doesn’t feel like responsibility, it’s just sparking a conversation.

“The sense of community that you build is almost unparalleled.”

From my personal experience, I have watched the app go through its own twists and turns, growing, getting fleshed out, and testing the boundaries. I’ve gotten the opportunity to put my input in and make some suggestions which have caused changes that I’ve always wanted to see from other platforms. For example, the fact that links are included directly in posts. For me that is something I use at least once a day. Specifically in the story for sharing music, I always make sure to include a link and I always try to tap on other people’s links when they share their music too. The links were such a visceral feature that I didn’t even know I needed. Snapchat was the only other platform that included a link feature but it’s not very good and sometimes it doesn’t even work. That’s why this app will feel different and unlike anything you’ve been a part of before, because it’s an original idea that’s learned and corrected its faults very quickly.

The app is not saturated and a very refreshing break from any other platform. It’s new, of course, but how the app operates is very successful at keeping the intentions and goals, good and genuine. GoinOn was created to simply share, but the focus is making that a fun and exciting experience. GoinOn succeeds because they have stripped social media down to its main point and ran with it.

I enthusiastically recommend Goinon to anybody, whether you have a lot of friends or not. Search for anyone on the app is easy and a great opportunity to just start sharing. If you want at least one friend you can always friend me, my username is @howmuchisyourduckworth

I’m a Product Management Intern at Dark Matter Digital — a strategic product studio that specializes in helping companies create and test new software verticals.

I’m also a sophomore at Drexel University, where I study film and video production.

Follow along with my journey of being a first time Junior PM in my blog series, which you can find on the Dark Matter Digital publication.

See ya!


This App Will Change Your Perspective on Stories was originally published in Dark Matter Digital on Medium, where people are continuing the conversation by highlighting and responding to this story.

Show More
Show Less

How to Write Product Requirements That’ll Wow Your Boss(es)

I’m a Product Management Intern — I just wrote a list of Requirements for the first time, here are my findings, struggles, and recommendations to others.

Recently, I was tasked with writing product requirements as a follow up to my PR FAQ. Requirements are a very important step in the development process because this is what your team will use to make sure what parts of the project are doable and make sure that the timeline will offer you enough time to make this happen.

For my first requirements document, I wrote the functional and visual requirements for a camera in a social media app. Requirements will probably be the most meticulous and tedious task you will have to master while being a product manager. It’s an entire skill that needs to be learned and understood. It took me four drafts just to get it through my head what requirements are exactly.

Whether you learn through definitions or hands-on, writing requirements is going to be a lot of trial and error. So less of figuring out what to do and more figuring out what not to do. But that’s completely fine, because you’re learning.

So, what are requirements?

In a very basic sense, requirements are a very specific set of needs or wants that will be included in a project or product. Using requirements are how your team members will collect all the information needed to build or design a product. The requirements of any product need to be specific enough so that if anyone was to come and try to start making mock ups of your descriptions, they could do it with ease.

There are two types of requirements to help with specificity and force you to think critically about what you’re doing. There are Functional Requirements and Visual Requirements. Functional requirements are limited to only how a user or customer will interact with a new feature, or the functions of this new feature. Functional requirements will often look like “Tapping directly on the downward arrow will trigger a drop down menu” while Visual requirements will look more like “Pictures are displayed in rectangular form”.

Starting my own requirements, I didn’t look for very many resources because I thought it was self explanatory. I watched a couple YouTube videos and read one article and thought I understood. I made my first draft and quickly became less and less confident and more confused. My first draft was very short compared to the others that I was using to go off of.

My boss(es) lent me multiple resources and gave me some pointers and prompts to make my information more well put and better laid out. I realized that I was combining the visual and functional requirements into the same points in order to condense more information into the same sentence. Don’t do that. Organize your thoughts and separate visual and functional information. And if anything, be too specific.

After taking those pointers and prompts into account, I started on my second draft. I made two different mistakes this time.

My diction was much too casual — what I was good at in the PR FAQ, was stopping my progress in my requirements. It’s only a couple of instances but it was enough to throw off the focus while reading it through. I used “camera” where I should’ve used “capture”, I used “you” and second person point of view where I should’ve used “user” and third person point of view. Always be conscious of the language you use and what context you’re using it in, but if you need to, write everything how you would normally and then go back through to places you can be more specific.

When creating requirements, you are creating a new process of events. You’re changing a process or a feature and making it better. So when you write this new process, don’t mention the old one. Don’t say “Instead of ___, this feature will be introduced”. All you need to say is what the feature will look like and what it will behave like.

This is my latest draft of my requirements. I won’t say my final draft only because there are still things I can improve on and projects change all the time. A week after you finish your requirements, you might have to go back in and tweak some things because a feature may be taken out for times’ sake, or it just wasn’t going to work, or someone else recommended a better way than what you had originally. And that’s alright. Everyone involved with the project is learning and just trying their best.

The Visual and Functional Requirements are separate, there’s language specific to this project, and the points and subpoints are descriptive enough so that anybody could pick this up and understand it. I did not expect everything to stay the same as it started as, content-wise. Lots of small features or behaviors changed since I started writing this and I have had to implement them. Aspects will continue to change that I will need to stay on top of and pay attention to so I can change them within the requirements.

Requirements are a big and, admittedly, scary thing to learn about for people who have never heard of the word in this context. Despite the fear of new concepts, learning how to correctly list out these requirements is a necessary step to take in this process because it allows everyone on your team to come to the same page. Essentially, requirements are very long and detailed outlines of the entire project you are working on — it brings up problems that you hadn’t considered and allows others to ask questions that will force you to think critically and it’s all a part of the learning curve.

I’m a Product Management Intern at Dark Matter Digital — a strategic product studio that specializes in helping companies create and test new software verticals.

I’m also a sophomore at Drexel University, where I study film and video production.

Follow along with my journey of being a first time Junior PM in my blog series, which you can find on the Dark Matter Digital publication.

See ya!


How to Write Product Requirements That’ll Wow Your Boss(es) was originally published in Dark Matter Digital on Medium, where people are continuing the conversation by highlighting and responding to this story.

Show More
Show Less

Writing My First PR FAQ

What I Learned Writing My First PRFAQ

I’m a Product Management Intern — here’s my journey on writing my first PR-FAQ including my findings, struggles, and recommendations.

My first assignment after being accepted as a first-time product manager for a start-up creating an app was to write a PR FAQ. I’d heard of a PR, and I’d heard of an FAQ, but I hadn’t ever seen the letters together before.

So I did some googling, it didn’t help much. There’s only one Medium article about it, and that’s really the extent of any information. There’s not much open to the public and not many templates to follow, so people with varying project topics are at a little bit of a loss.

Since I’ve seen, quite literally, nothing about this topic online, here’s some things that I’ve done wrong and learned from writing my first PR FAQ that I hope can be useful to others.

What is a PR FAQ?

Literally, a PR FAQ stands for Press Release with Frequently Asked Questions. The Press Release being the announcement of a new feature of a product or project, a new product or project, a new layout of a screen, or any changes made to or having to do with a product or a project. The FAQ are questions that you (the writer) will assume the audience, the user, or a newcomer to ask about whatever is being announced. The second part of the questions that you will assume the people you work with and higher ups will ask about the announcement and its features. PR FAQs are used for putting customers/users thoughts and needs first. These are also great documents for getting everyone in the project on the same page with each other.

What I Had Trouble With

First of all, I was a little too conversational. I took this document as something that I assumed the average person would read and need to understand. That’s not quite the case. It’s a good idea to hype up the announcement and sell your product, trying to get as many people as interested in it as many, but you don’t need to spoon feed the readers information. This is aimed towards who it pertains to, so really anybody interested in what you’re doing. This means that not only will the average person read your document, but the people within your company will too. You need to condense a lot of information into ten paragraphs, for anyone at any level of involvement to read. This isn’t to say you have to be very rigid or strict with your wording, just enough to give yourself credibility. Be clear and concise, use general language but don’t give general information. Don’t repeat phrases just so you don’t have to be specific.

It was difficult trying to think from another person’s perspective nevertheless two people’s perspectives. The public and internal sets of questions don’t need to be very specific, but it needs to sound like the customer or an internal person is asking. The public questions will be a lot of “how do I do this?” and “can I do this?” while the internal questions will be more about “how will this help us?” and “how will users interact with this?”. Public questions revolve around how the product/project works and how easy (or difficult) it will be for them to figure out how to work any new feature. Internal questions are concerned about their competitors, their longevity, and figuring out of something is of quality for their customers or users. Below are some examples from my first PR FAQ dealing with making a new capture/camera screen.

Public FAQs

  1. How long is the limit to record/upload a video?

The time limit for videos is fifteen seconds.

2. How can I upload pictures from my camera roll?

Swipe up diagonally from the bottom left corner and you will be taken to your camera roll where you can choose an image from any photo album on your phone.

3. How many seconds of a video can I upload from my camera roll?

The fifteen second limit still remains. If you want to upload a video longer than fifteen seconds, there will be an edit page where you can shorten the video to which part you want within the time limit.

Internal FAQs

  1. How does this compare to other popular apps?

The screen itself, specifically how the camera fills the entire screen is similar to Snapchat and Instagram stories, but this is a very unique screen that gives the user a lot of freedoms. It’s a refreshing break from the overused circle button and it will be very recognizable.

  1. What will users like least about the new features/layout?

Eliminating the “picture button” itself may throw people off and will be hard to get used to. However, the layout is familiar enough to quickly get used to it and will not be too strange after an hour or so of use.

  1. Which features will users interact with the most?

The features that will get most interaction will be the diamond and the camera roll buttons to take/pick photos/videos. Besides these two features, the flash button will be used the most.

Following templates is hard, especially when there’s not that many of them open to the public. When I did manage to find a nice template, I struggled with knowing when and how it could apply to the project I was writing for. Following templates is also hard when you are still having trouble understanding how you’re supposed to be writing. Nevertheless, take anything you can get. Copy and paste any and all templates you can find into a document and take it one by one, applying their steps and questions to what you’re working on. Once you finish, try to find which one seems like the best fit. If you have to, find the ones that don’t fit and work backwards. I stuck with using the Medium’s only PR FAQs article that I could find. It’s very simple, broad, and vague enough to fit to near any type of project or product you’re working on.

To get started, think about your problem and solution. You’re making something new, presumably, to fix something or to make an action easier than it was before. So you really need to think about why you didn’t like this thing originally and why it didn’t work for anyone else. Once you have a firm grasp on everything negative about this thing, you start to make your solutions to the problems you’ve found. These are the aspects that you want to see change and that you know will do better than what was there originally. Make a T-Chart if you need to (pros and cons list) — most importantly, just get started.

At the end of the day, PR FAQs are useful documents. It’s the first step in any project for advancing or changing up a product because it lets everyone know what the end goal is. It’s also a good time for you to start working through what you think is best and what you don’t. Imagining what the best options are and writing them down will help you and your team in the long run.

If all else fails and you are really at a loss and you feel like you bit off more than you can chew, always ask questions. The people in charge of you are there for a reason, they want you to ask questions. They want to have the best possible outcome so if you’re frantically searching the internet and finding nothing, ask for resources. Despite the fear of letting your boss(es) know you are inexperienced in this, it’s a great teaching and learning opportunity.

Those are just some things that I learned from my first ever PR FAQ. I wish you find something that works for you and you stick with it and it brings you a “job well done”.

I’m a Product Management Intern at Dark Matter Digital — a strategic product studio that specializes in helping companies create and test new software verticals.

I’m also a sophomore at Drexel University, where I study film and video production.

Follow along with my journey of being a first time Junior PM in my blog series, which you can find on the Dark Matter Digital publication.

See ya!


Writing My First PR FAQ was originally published in Dark Matter Digital on Medium, where people are continuing the conversation by highlighting and responding to this story.

Show More
Show Less

Get Plugged in with Google Analytics in 2 Steps

How to Set Up Google Analytics in 2 Steps

A quick and simple guide to connecting your SaaS platform to GA

We recommend reading the first article in this series before continuing: 3 Google Analytics Rules to Live By

If you’ve read the article above, you’ve learned how important Google Analytics (GA) can be for your company’s success. In this article, we’ll go over how to connect your SaaS platform or website to GA using a brand new GA account.

Step 1 — Setting Up the GA Basics

As we know, GA’s purpose is to track users on your website. Google accomplishes this by using a tracking device called a Global Site Tag (gtag) which is installed manually on your website. Gtag is a javascript tagging framework and API that allows you to send event data to Google Ads, Campaign Manager, Display & Video 360, Search Ads 360, and Google Analytics.

Our first step will be to create an account at https://analytics.google.com/. Log in to the Google account associated with the website you want to connect to GA and click “Set up for free”.

Create your free account at analytics.google.com

Account Setup

  1. Account Name — First you’ll be asked to enter the account name. The account name is the highest level of account you can have in GA. Under your account name are your properties (websites and apps). You may want to name your account the name of your company. If you are an individual developer using this for a project, using your name would work as well.

Pro Tip: When creating an account for a Saas product, name the account the company name, not the product name. That way if your company has multiple products and websites this naming convention will work nicely. See an example below:

Account Name [Company Name]

  • Property Name [Sass Product 1]
  • Property Name[Saas Product 2]
  • Property Name[Marketing Website 1]

You can dive into each data sharing section on your own — for now we are going to keep the default (recommended) settings checked and continue by hitting next.

Your Account Name should likely reflect your Company Name

Selecting a Property Type

2. Properties in GA are just underneath the account in the hierarchy like we mentioned above. A single account can have multiple different properties. Think of a property as a single application you have running within your company that you want to capture metrics on.

This is the step that gives users the most trouble when setting up a new account given that Google has recently introduced a new beta property. You can easily get confused by this new beta property type “Apps and web” since it seems to combine both the other types.

For our scenario we are setting up GA to track our Sass website traffic and user metrics, so we will be using the web type.

Pro Tip: When setting up tracking analytics integration for your business, don’t use any beta software. It may not seem like a big deal now, but we need to ensure 100% tracking accuracy and a bug free integration, especially when the end goal is to connect to google ads where money is on the line. After this setup is complete you can always add more properties to your account to play around with the beta features.

Select the property Web Type

Property Setup

In this step we can define what website or application the property is going to be collecting metrics from.

Pro Tip: It’s a good idea to explicitly define your properties as to be able to handle more than one in the future. See our example below.

In this example, we are tracking website metrics for our saas product website so we will name it as such. This leaves the option to define a second property for our marketing site, since most saas products and marketing sites are separate domains. Here is an example of a future setup or account and property names:

Dark Matter Digital

  • Dark Matter Digital — Saas Console
  • Dark Matter Digital — Marketing Site
  • Dark Matter Digital — iOS App

Set the rest of the fields and click create and accept the terms.

Define a naming convention for your properties that can be used across multiple domains within your account.

Step 2— Connect Your Website to Google Analytics

For GA to start capturing metrics on your website, you need to manually connect your website to Google Analytics using their API and Javascript. Google does most of the work here and gives you a pre-built javascript snippet ready to be dropped into your website’s head tag. This is called the Global Site Tag (gtag). This javascript code houses your property tracking ID and is how Google knows what property you’re tracking. If you’ve heard about Facebook tracking, this mechanism is referred to as a tracking pixel on Facebook’s platform. A Gtag and a pixel pretty much do the same thing — they capture data from the page and send it to their respective analytics platform. You can have both Facebook and Google trackers on a single site.

Pro Tip: Each property you create gets assigned a tracking ID. This tracking ID will be used when moving past the basic setup and into more complex setups like integrating Google ads and Google Tag Manager. Therefore, make sure to create separate properties for assets that will be marketed separately.

Each property receives its own Tracking ID used for Google Ads and Tag Manager

To complete the setup you’ll need access to your website or platform’s layout file and modify the code in the head tag. Here you will paste the following snippet of javascript that google provides you with.

Paste the snippet of javascript that Google provides into the head tag of your website

Pro Tip: DISABLE YOUR AD BLOCKER. This is always a headache as to why your tracking snippet isn’t working. After your ad blocker is disabled, refresh your site.

After a few seconds (and up to a minute), the GA dashboard page will update to display “1 active user” under the Status section next to the Tracking ID (shown below). If you still don’t see “1 active user” we can start to troubleshoot the issue.

You should see “1 active user” on the right side of the screen

Pro Tip: For troubleshooting we recommend Google’s Tag Assistant Chrome extension which can be found here.

For testing your Google Site Tag with the extension, click on the extension and enable it on the page. Hit refresh. If there are any issues with your website’s gtag, they will show up in the extension window. If all else fails and you still can’t connect to Google, don’t hesitate to reach out to Dark Matter Digital. We love a good Google tracking troubleshoot.

This is the Google Tag Assistant Chrome Extension

That’s It!

And there you have it - you’ve successfully connected your website or product to Google Analytics and have taken the first step towards a better product. Now take a look around the GA dashboard, and all of the reports, charts, and visuals GA has to offer. In our next article, we will cover setting up custom events.

At Dark Matter Digital, we get super pumped up about a great Google Analytics setup. We look to it as a backbone of every product we build. If you’d like to learn more about GA, or need help getting setup — give us a shout!

Dark Matter Digital is a product studio based out of Seattle, WA.

We build products smarter, better, faster, AND stronger.

Need help getting a project off the ground? Email hannah@drkmtr.marketing.


Get Plugged in with Google Analytics in 2 Steps was originally published in Dark Matter Digital on Medium, where people are continuing the conversation by highlighting and responding to this story.

Show More
Show Less

3 Google Analytics Rules to Live By

Google Analytics is an incredibly important piece of your product puzzle — make sure you are getting the most out of it!

Getting Started

Analytics tracking is a crucial piece of software development — understanding how and when your users are interacting with your product is key to measuring the success of your product. Without tracking user behavior on your site, you can miss gaining insight to key success metrics such as bounce rate, page visits, new users, new sign ups, conversions, and more. Having insight to these analytics also allows you to track the success of your marketing strategies and campaigns, understand in-depth user behavior, and identify when there may be a functionality issue with your site.

In this article, we’ll walk through 3 rules to follow when getting up and running with Google Analytics (our go-to option for analytics tracking).

First, a few quick reasons why we prefer starting with Google Analytics:

  • It’s free! — Google Analytics doesn’t require a payment or subscription to use
  • Data Visualization — Google Analytics offers easy-to-read charts and graphs, making analysis easy on the fly
  • Real-Time Data — See stats about your site in real-time, and use this data to build reports down to the hour
  • User Interface — the browser-based UI may be overwhelming at first, but you can quickly become accustomed to all of the toggles and levers within GA
  • Reporting — Easily build, analyze, and export customizable reports
Having the right mindset about analytics is key

When setting up Google Analytics, it’s important to have the right mindset. Below are the two most common — can you guess which one is the right mindset?

  • ‘Implementation is just dropping in the files and calling it a day. I’ve checked GA off the list, time to move on!’
  • ‘Woo hoo, time to set up GA, an incredibly important step in my product’s success! What do I want to know about my product to help me make better decisions in the future?’

If you guessed the second mindset, you’d be correct!

This mindset may seem daunting, especially if you’re a Google Analytics newb — but fret not! We are here to guide you through the setup in just a few steps, so you can achieve success.

First, let’s go over how you can turn a simple Google Analytics setup into a powerhouse of data that guides your product features and roadmap.

Rule 1: Integrate Google Analytics into your company, not just your software

When you create a GA account, or if you already have one, give everyone in your company access. Encourage developers, product owners, and marketers to get familiar with the platform. GA should be a source for everyone to go to and view the product’s success — marketing should know how their campaigns are affecting website traffic, product owners should know where users are dropping off, developers should know how many people are using the product and where scaling is necessary, and so on. Having buy-in from multiple stakeholders on multiple teams will increase the relevance of important data across your organization.

In addition to granting out access, have everyone download the mobile app. This is a great tool to have on hand in case of emergency or needing to quickly view a statistic.

None of this will work, however, if no one invests time into learning GA. Set aside time for your company to learn GA — walk through the dashboards, reporting, etc. Make sure they know it’s ok to spend time learning this tool, as it is an important piece of your company’s backbone. When it comes to product performance, don’t opt for an out-of-sight-out-of-mind mentality. Become familiar with your trends and embrace them, using them to guide you through your decisions on what comes next. Using user-driven data allows your teams to produce more useful products and features.

Rule 2: Create Custom Events

The custom events feature in GA is super useful. Not every website or app is built the same and luckily, GA gives you the power to make your analytics platform work for you. GA gives you a good foundation, but it’s up to you to fill in the rest!

GA will track some events by default, including:

  • Users
  • Page Visits
  • Bounce Rate
  • Session Duration and more

However, there are likely other metrics you are concerned with and need to track. Custom events can be made easily using the SDK.

With custom events, you can track the following and many, many more:

  • Low frequency conversions (for example, a completed sign up or purchase)
  • High frequency conversions (for example, an add to cart or a sign up initiation)
  • Form Errors
  • Engagement on a CTA

Rule 3: It’s Never Too Late to Collect More Data

Collecting data should be prioritized, whether you are starting with a new product or beefing up an existing product. It’s never too late to add in a new metric if you forgot it the first, second, or tenth time! You may release updates that need additional tracking, or find that you could make better decisions if you started tracking a metric on an existing function. Too much data is never a problem.

These 3 rules will ensure your product is more successful. Why? Because data is power. With the right data in hand, product discussions can be led by analysis and fact rather than idea and opinion. Marketing campaigns can be driven by what converts best. Developers can understand where the highest load is on their site, and work to optimize the experience for all. Approaching your product from an analytical and data-driven point of view will ensure your success in the long run.

At Dark Matter Digital, we get super pumped up about a great Google Analytics setup. We look to it as a backbone of every product we build. If you’d like to learn more about GA, or need help getting setup — give us a shout!

Dark Matter Digital is a product studio based out of Seattle, WA.

We build products smarter, better, faster, AND stronger.

Need help getting a project off the ground? Email hannah@drkmtr.marketing.


3 Google Analytics Rules to Live By was originally published in Dark Matter Digital on Medium, where people are continuing the conversation by highlighting and responding to this story.

Show More
Show Less

How to Build an Effective SaaS Marketing Landing Page

Make sure your SaaS marketing page achieves these 3 goals

Building an Effective Marketing Page

SaaS products should have one main goal that surpasses all others when it comes to prospective customers: conversions. Your marketing site should be focused on getting your prospective customers to convert.

Everything that you include on your marketing page should work towards achieving one or more of these three goals:

1. Catch the prospect’s attention

You have about 10 seconds to catch a user’s attention once they reach your webpage, meaning less than that to make an impact. Differentiate yourself from the competition right away. A big, bold statement about what your product does and why it rocks is important to start off with. If you can get them interested here, you can get them to scroll a little father.

Square.com’s homepage boasts an attention-grabbing and descriptive message immediately

2. Convince them that they need your product to solve their problem

The meat of your marketing site and pre-onboarding process lies in the information you put out on your site. Users aren’t as quick to give up their information to a website as they once were, and given we are much more busy, users are less likely to spend their time signing up for something they aren’t confident in. Your marketing site should answer the following questions in order to convince the user to sign up for your product:

  • What does this product do?
  • Why should I care?
  • How is it different from what others offer?
  • Is there a cost?
  • Is signing up easy?
  • Ok I’m convinced — how do I sign up?
Squarespace

3. Allow them to convert

Once a user decides they want to use your product, signing up should be a no brainer. Place CTA’s throughout your site so that they stand out and are easy to find. It’s best practice to have a CTA in your nav bar, and then at the end of the page, before your footer, as well. Sprinkling signup CTA’s throughout your site with informational tidbits can also help guide the user to the signup process.

Squarespace strategically offers ways to ‘Get Started’ with every small scroll

Let us know your other marketing page tips in the comments below.

Dark Matter Digital is a product studio based out of Seattle, WA.

We build products smarter, better, faster, AND stronger.

Need help getting a project off the ground? Email hannah@drkmtr.marketing.


How to Build an Effective SaaS Marketing Landing Page was originally published in Dark Matter Digital on Medium, where people are continuing the conversation by highlighting and responding to this story.

Show More
Show Less

7 Onboarding Must-Haves to Increase SaaS Signups

Follow these onboarding best practices if you’re looking to increase your SaaS platform signups

The SaaS industry is hot — and is forecasted to reach $82.6 billion in revenue this year (2020), after an 11.6% ramp up from 2015. If you’re planning on launching a SaaS product or putting more marketing dollars into your existing product, great! We want to give you some quick tips on how to make sure your prospective users convert to your platform.

Best Practices to Increase Your SaaS Signups

Having a great SaaS idea is one thing. Having a great SaaS product is another. Your idea can solve problems, educate the world, and save businesses money, but if users aren’t getting on to your platform and using your product, none of those things will ever matter.

By creating a frictionless and robust onboarding process, you can:

  • Increase your signups
  • Reduce user churn
  • Gain necessary info to make your product’s user experience better
  • Build up trust and reputation

With that said, let’s dive into some best practices around SaaS user onboarding:

Informative Marketing Page

When it comes to onboarding users, don’t leave all the heavy lifting up to your product. You should rely on an informative marketing site or landing page to drive consideration for your product. Your landing page should achieve these 4 goals:

  • Catch the prospect’s attention
  • Educate them on what your product does
  • Convince them that they need your product to solve their problem
  • Allow them to convert

Your landing page should make it absolutely clear what your product does. If a prospect finds a competitor that quickly describes a solution to their problem faster than you do, you’re likely to lose. For more detail on the 4 points above, read this article about creating converting SaaS marketing pages.

Separate Landing Pages for Multiple Products

If you’re a SaaS platform that has multiple products, it’s best to differentiate them between individual multiple landing pages. Trying to cram all the information about multiple products into one page can be confusing. Instead, build out individual product pages for each offering. Each landing page should follow the brand of the overall company, but be different enough from each other to be distinguishable.

Atra provides a clear distinction between product offerings while maintaining a cohesive brand and selling point
photo: atra.io
photo: atra.io
photo: atra.io

Make Converting Easy

If you give your users the ability to do one thing, make sure it’s to convert. Don’t overwhelm your users with different options of what to do and where to go — keep your eye on the prize and narrow them in on completing the goal. Conversion CTAs should be placed through your website and give a clear signal of what the user is about to do, for example, “Sign Up,” or “Enroll Today.” Don’t put conflicting CTAs next to each other, for example, “Contact Us” and “Sign Up Now.” This distracts from the main goal, which is to sign up.

After you’ve clearly outlined where your users can convert, make it as EASY as possible for them to complete the mission. Signing up for your product should be simple and straightforward. Depending on what type of product you offer, you may or may not want to collect more or less information when signing up.

Squeeze Page

Once they’ve entered into the funnel, don’t let them out ;). Rid your onboarding process of all distractions and miscellaneous options that may lead the user to divert from the funnel. Provide a simple experience with one goal — to complete the sign up, subscribe, checkout, etc. Retail sites commonly use a squeeze page to guide users throughout the checkout process without any distractions. Once a user goes to ‘checkout,’ the retailer doesn’t want to risk that shopping cart being abandoned. Use the same methodology for your software signup process.

Outdoor Voices is a clothing retailer with a great example of a squeeze page. Once you click checkout, you are taken to a page stripped of all actions but to ‘Pay Now’. No second guessing now! Even the navigation is gone, and very little emphasis on going backwards.

Outdoor Voices Checkout Squeeze Page

Documentation and Education

We’ve learned that a ton of a product’s success lies within educating the user. When we implemented documentation, including tutorials, for the Atra platform we saw a 97% increase in users who used the platform immediately or shortly after signing up. This caused repeat users to increase, as they followed along further with documentation and become more comfortable with the platform. If you don’t give your users enough information at first, they may drop off and never feel comfortable coming back again. Make sure not to hide your documentation behind authentication, either.

Another way to educate your users is through a walk-through of your product. Helpful hints and tips, or ‘how-to’ buttons in chronological order can be super helpful for a first-timer. YouTube video walkthroughs are great resources to have, and help your SEO, too!

Amazon Web Services might be the most robust example, but they are a great resource for documentation inspiration.

AWS Documentation
Stripe’s documentation is front and center on their landing page

Pre-Filled Dashboards

When a user completes your onboarding process for the first time and finally lands on the dashboard of your product, it can feel pretty disappointing and confusing to land on a page of empty charts, even if subliminally. It’s worth gathering as much information as possible during the onboarding flow so that you have something to show the user upon their first arrival to your product. You may not want to gather ALL the necessary info during onboarding, as that can become too tedious and distract from the main goal. Gathering 1 or 2 data points however can make the first impression much stronger.

If collecting data during onboarding isn’t an option or doesn’t make for a good user experience, make sure your user knows exactly what to do once they arrive at the platform to continue their setup. To avoid confusion, put instructional overlays over charts, and disable the ability to click around on something that is empty and will return null answers.

Mobile First

Finally, make your entire conversion funnel mobile friendly. You may have an enterprise software that’s built for desktop, but that doesn’t mean your users are built for desktop anymore. Now that the majority of all internet traffic happens on mobile devices, it’s safe to assume your prospect is going to want to sign up from their phone. Even if your users will be using your product on desktop, allow them to sign up via mobile. If your dashboard isn’t mobile-friendly we totally recommend you work on that in the future, but in the meantime, display a polite success message after signup that reminds them their best experience will be on the desktop site.

Atra’s onboarding and services are mobile-friendly allowing for frictionless signups and activity

Let us know your other onboarding tips in the comments below.

Dark Matter Digital is a product studio based out of Seattle, WA.

We build products smarter, better, faster, AND stronger.

Need help getting a project off the ground? Email hannah@drkmtr.marketing.


7 Onboarding Must-Haves to Increase SaaS Signups was originally published in Dark Matter Digital on Medium, where people are continuing the conversation by highlighting and responding to this story.

Show More
Show Less

Introducing Dark Matter Digital

We Build Products Stronger. Better. Faster.

Building a software product is a tedious process that can’t, and shouldn’t, be done overnight. The quality of the product in which a company puts forth is ultimately one of the most important key factors in the company’s success. The product embodies the company, and vice versa.

While companies set out with the best intentions when building their software products, many commonly make either one or both of the mistakes below:

  • They fail to realize the importance in following a strict product development process and cut many corners along the way. This results in a subpar result and unwanted tech debt (eek!).
  • They over-engineer and complicate from the beginning by coming up with a MVP that is too feature heavy for the initial or upcoming release, increasing the time to market and risking putting too much work into a feature set not needed by the users.

Both scenarios above inherently lead to a subpar product, meaning more time spent on resources and less earnings for the company.

Dark Matter Digital was founded by product development experts who work against these common pitfalls. We’ve worked for years at developing and fine-tuning our product development process and are here to guide other companies to success by helping them develop and release ready for market products.

WHAT WE DO

Dark Matter Digital offers product development consulting and execution for companies with existing products, or ideas for new products that need to be prototyped and tested. We not only act as designers and developers, but as product owners working to develop technical, UX, and go-to-market strategies for your product(s). We work with your team, stakeholders, and customers to determine the best options for your company moving forward.

A FEW THINGS WE BELIEVE

Don’t Cut Corners

We don’t put ourselves in a place where we have to cut corners. We come up with a detailed plan of action to get your new product off the ground, or your existing product back on track without sacrificing quality.

Trim the Scope

We get to know your goals up front. Before design or development starts, we emphasise planing upfront to strategize the best possible scope of work to meet your goals. We start with what’s important, and evolve as time goes on.

Be Agile and Quick to Adapt

We value working within an agile timeline with an end goal for each two week sprint. We believe in this process because it allows your company to work and iterate quickly, with the opportunity to re-evaluate priorities every two weeks. When working with clients, we will aim to have deliverables at least every two weeks to keep the project moving forward.

A Big Backlog is a Bad Backlog

Backlogs tend to get out of hand — bugs and feature requests can pile up very quickly resulting in months or years of work. Many product owners can and will get bogged down in the idea that everything in the backlog needs to be completed. We are here to tell you to delete your backlog. Now. The weight of a backlog can be crippling to a company. Rather, reevaluate your priorities every two weeks and create new tickets. In most cases, tickets, ideas, and stories that were created months ago are no longer relevant. If they were important, they would have been completed by now. Taking a step back every two weeks to reevaluate what should and will be done will keep your company quick on its feet, and uncommitted to features that may be irrelevant down the road.

Analytics is Key

Tracking the behavior of your users and the performance of your product is key to keep your product evolving. Dark Matter can help you set up the necessary analytics to track your users from top to bottom, side to side. The more you know about the usage of your product and the behavior of your users, the more empowered you will be to provide features that suit their needs.

WHO WE ARE

Hannah Duckworth and Dillon Vincent

Hannah Duckworth and Dillon Vincent started Dark Matter Digital so that they could bring their love of product development to other companies. We’ve built products ourselves and have both worked across many different industries. Together, we’ve built healthcare and blockchain based SaaS platforms from scratch. We’ve also built and released a social media application. Dillon has over a decade of engineering experience, as well as product management experience and is an expert in technology consulting. Hannah is a UX designer and product manager, with a background in digital marketing and customer acquisitions for enterprise-level companies. Both Hannah and Dillon have deep experience in industries such as SaaS, E-Commerce, and Blockchain.

WORK WITH US

We’d love to hear from you. Let us know how we can help by contacting us via our website.


Introducing Dark Matter Digital was originally published in Dark Matter Digital on Medium, where people are continuing the conversation by highlighting and responding to this story.

Show More
Show Less